Cübe Server
Andrew's Project Portfolio
 One of the nice things about living in NYC is that you can expect a cozy home with access to world-class food and people from all walks of life.
Sometimes it gets a little too cozy, thus winning at life involves figuring out how to optimize space for necessities. My roomate and I enjoy watching documentaries and movies, and I need a server to work on.
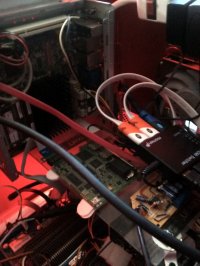
So I consolidated two computers into a single cube within our home's shelving system, and automated the powering on/off of the projector and rolling up/down of the screen. This system now allows you to sit down, pick up the miniature wireless combo keyboard/mouse and roll the projector screen down and turn on the projector with a single key combination for multiple sources.
Highlights

Design Constraints
Designed around the following constraints, in descending order of impact:
- Reliable
- Low-noise
- Good performance
- Low-cost
- Expandable
System Architecture
Housing
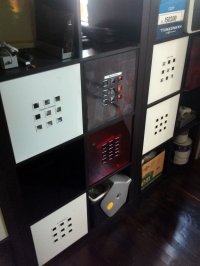
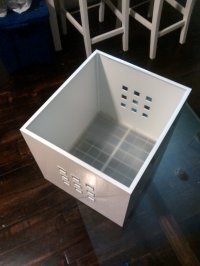
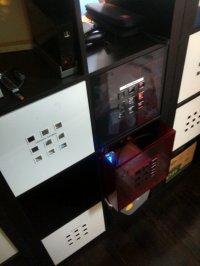 Our shelving system is IKEA made, with the insertable storage cubes having internal dimensions of 32x35x32cm [12.6x13.78x12.6in]. Made of fashionable translucent and solid colors for $13 in thick (less-than-environmental) plastic, these are great for long-term durability and construction quality. The finger-holes along the front and rear solve the problem of cool air intake and hot air exhaust respectively.
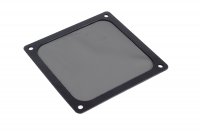 Attaching a stainless dust screen on what is now the intake allows me to catch dust before it enters the housing, cleaned easily with a damp sponge. A large diameter high-pressure high CFM Nidec fan on the outake forces airflow through the housing at low noise volumes.
Computing Components
I selected the Micro ATX form factor for its dimensions of 244mm x 244mm [9.6in x 9.6in] which would allow me to fit multiple full-performance PCs inside of a single cube, along with additional required accessories (more on that farther below).
Knowing that one system was going to be a general purpose server and the other a home-entertainment/automation system affected component selection as did the knowledge that I wanted a full 64-bit CISC system rather than the cheaper but less time-tested ARM architecture, I chose the following parts:
| Role: | Server | Home Theater/Automation |
| Motherboard: | Intel D2500 Fanless Atom | Asus E35M1 AMD Fanless |
| Processor: | Atom D2500 (Integrated) | AMD E350 Hudson (Integrated) |
| Memory: | 2GB DDR3 | 2GB DDR3 |
| Storage: | 3TB WD Red |
Boot: 128GB Micron SSD Data: 3TB WD Red |
I chose fanless systems to increase reliability in case of fan failure, as these systems are tested by their respective manufacturers to mitigate damage at higher temperatures without going down.
Electromechanical Systems
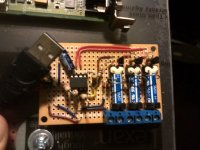
Using an Attiny85 and the C-based VUSB library, I modified preexisting code to program the ATTiny to control 3 reed relays using a USB interface. You can see the attiny85 microcontroller in the mid-left region of the control board, and the 3 reed relays along the right-hand side.
After building, programming and testing the board, I subsequently programmed the operating system to execute scripts which dictate which relay to actuate, and for how long using only buttons on the wireless keyboard/mouse combo. Who knew there was so much going on behind the scenes?
Software
 My operating system of choice tends to be a very stripped-down version of either debian or ubuntu server, depending on whether I need reliability or support for newer hardware, respectively.
For the entertainment system, I'm using Kodi Media Center as the media frontend to videos loaded off the local storage, as well as for remote streaming sources like Youtube and Netflix.
This system also acts as the local backup node for both my and my roommate's laptops, it is fast and inherently private compared to using external cloud solutions.